
A Closer Look at the Valeton GP-200X Signal Chain
As an Amazon Associate, I earn from qualifying purchases. That means I earn commissions from my sponsored links or I make money when readers (you) purchase items through my links. Your purchase allows me to continue working as a stay-at-home dad who moonlights as a farmer and a musician. Needless to say, this post contains affiliate links.
140 amp models is a lot.
Here’s how not to lose your mind navigating through them.
If you read the GP-200X review already, you know the basics.
140 amp models, 11 effect modules, Bluetooth… blappity blah blah
TBH, it was the color is still what got me first… it just looked like it was a fun toy
But the deeper you go into this unit the more you realise the design is genuinely thought through… and the signal chain is the best place to start understanding why.
· · ·
How the Signal Chain Works
The GP-200X runs your signal through 11 effect modules in sequence.

Think of it as a virtual pedalboard where each slot in the chain is a specific type of effect. The order matters exactly the way it matters on a real board… compression before drive, drive before modulation, modulation before delay, delay before reverb. The GP-200X sets this up logically by default but the key thing to know is that you can rearrange the modules in whatever order you want. That flexibility is more useful than it sounds once you start chasing specific tones.
Default Signal Chain · GP-200X
Guitar goes into input
→ Module 1 Compressor
→ Module 2 Boost
→ Module 3 Wah
→ Module 4 Distortion
→ Module 5 Amp
→ Module 6 Noise Gate
→ Module 7 Cabinet
→ Module 8 EQ
→ Module 9 Modulation
→ Module 10 Delay
→ Module 11 Reverb
→ Output XLR / 1/4″
All 11 modules are rearrangeable. Send and return loop available between modules for external pedals.
The 11 Modules · What Each One Does
01 – Compressor
Evens dynamics, adds sustain. Keep it subtle for cleans, more aggressive for country or funk.
02 – Boost
Push the amp model harder or raise your solo volume. Assign to a footswitch for instant level jump.
03 – Wah
Expression pedal controls the sweep. Assign to mode A or B on the dual preset for hands-free switching.
04 – Distortion
Where the Precision OD and Sur Riot simulations live. The Precision OD is the one to try first for high gain.
05 – Amp
The core of the tone. Use the dedicated amp knobs on the GP-200 core model for fast live adjustments.
06 – Noise Gate
Place after the amp for high gain. Raise the threshold until noise disappears without cutting your sustain.
07 – Cabinet
Always pair with your amp selection. Use the low cut and high cut to make cab sims sound more realistic.
08 – EQ
Global tone shaping after the cab. More useful for live room correction than studio work.
09 – Modulation
Chorus, flanger, tremolo, phaser. Standard time-based placement after distortion and amp works best.
10 – Delay
Tap tempo syncs to the drum machine. Use analog bucket brigade setting for warmer repeats on clean tones.
11 – Reverb
Always last in the chain. Room and Hall for most gigs, Shimmer for worship and ambient work.
Which Amp Models to Try First
140 models definitely sounds overwhelming until you realize most of them fall into recognizable categories that you already know.
Here’s where to start depending on what you’re playing right now.
Starting Points by Style
- Clean / OPM ballads: Look for Fender-type models — Twin, Deluxe, Princeton simulations. Wide, glassy, sits back in a mix without fighting the vocal.
- Church / Worship: Matchless-type models. Compressed, chimey, responds beautifully to a compressor in front. Pair with the Shimmer reverb.
- Classic Rock / Crunch: Marshall-type simulations. The UK 800 is the JCM 800 equivalent and it’s the first one worth dialing in for anything 80s or 90s driven.
- High Gain / Metal: Mesa Boogie and EVH-type models. The Precision OD in the distortion module stacked in front of a high-gain amp sim is the Periphery-adjacent tone the Filipino review demonstrated.
- Vox / British Clean: AC30-type. Bright, jangly, excellent for indie and alternative. One of the most usable tones in the unit straight out of the box.
- Bogner types: For a touch of luxury — the Bogner Shiva-type models appear in the artist presets and reward patient EQ work with something genuinely premium sounding.
The fastest way to stop being overwhelmed by 140 amp models is to pick one category, dial in one tone you like, save it to a user preset, and move on.
You don’t need to audition all 140.
You need five or six patches that cover your actual gigging needs. Build those first and everything else becomes exploration rather than obligation.
Get It in Davao · Azaka Music Hub
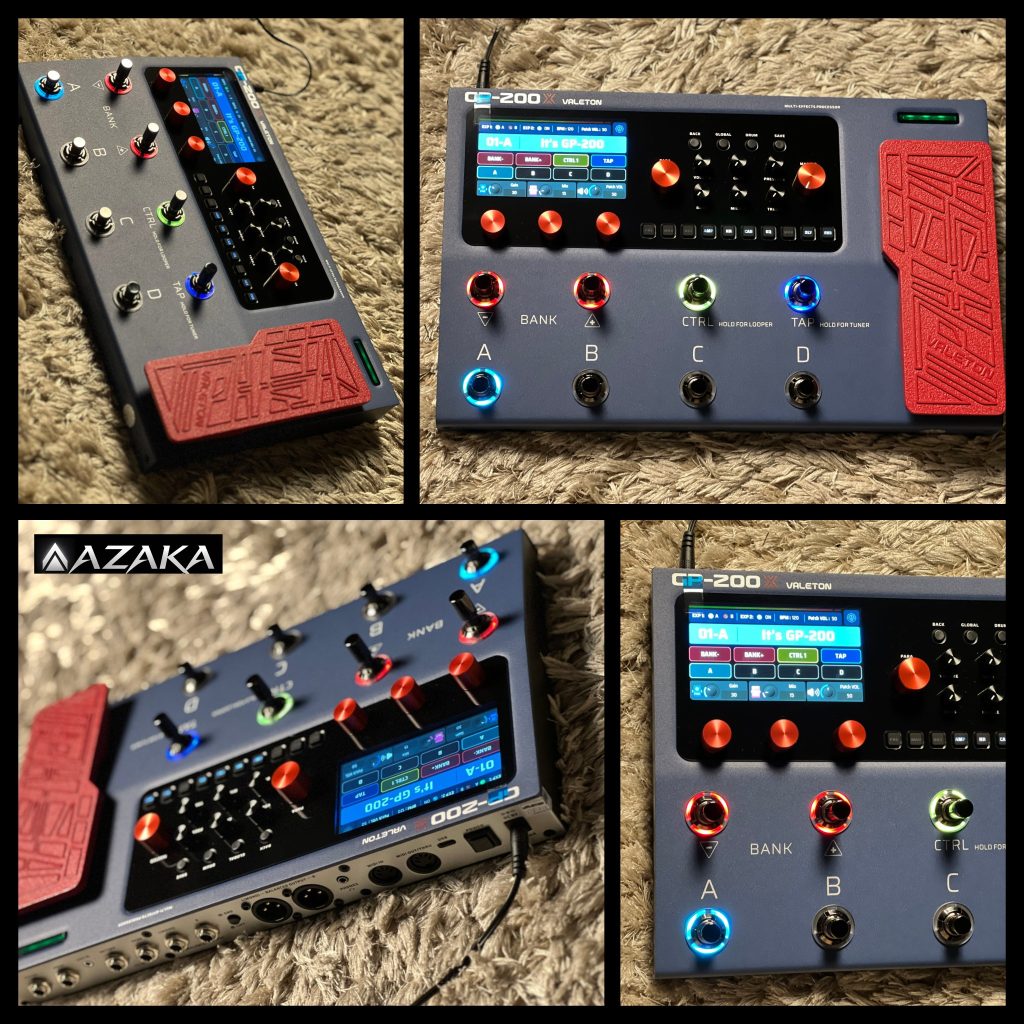
The GP-200X is available through Azaka Music Hub, Davao City’s specialized gear store since 2016. If you want to see the unit in person before buying or have questions about how it fits your specific setup, Jero and the Azaka team are the people to ask.

You Can’t Unsee The Eye Of Horus

GarageBand vs BandLab — Which is Better for Your Portable Home Studio?